Thursday, August 22, 2013

Hive no. 2 is looking good

One frame of brood from hive #2
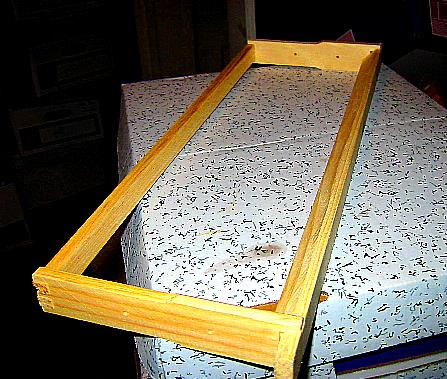
Five days ago I inspected hive 2.  It looks like its doing well.  There was lots of brood in both boxes, mostly in the bottom box.  I spotted the queen, too.  I took out the drone frame and replaced it with a foundationless frame that I had prepared it by removing the foundation from a frame and putting beeswax in the groove that held the foundation in the top.  Most foundationless frames have a wedge in the top similar to the top-bar tops.  We'll see how this works, like everything else.
There didn't seem to be any new wax drawn, but there were 2 frames with honey in the top box.  The hive looks healthy with all that brood.
I checked the drone pupae for mites.  Out of 17 pupae checked I found 0 mites!

Tuesday, August 20, 2013

Success with Olea's hive cross-combing

Earlier I had seen cross-combing on the distal combs in the top-bar hive.  It took form as a horizontal comb attached to the bottom of several vertical combs.  I expected that I would have to remove all the combs en bloc when it came time to harvest the honey.  At the conference I learned a bit more about top-bar beehives, and now, being an expert, I decided to take care of it now.
I was able to remove the back board and a couple of bars from the very back.  The back board was firmly attached with propolis and took a bit of work.  The last two bars had only a little comb and came out easily.  This is what I saw looking down into the box:
 You can see the horizontal comb protruding.  It crosses 3 or 4 vertical combs.
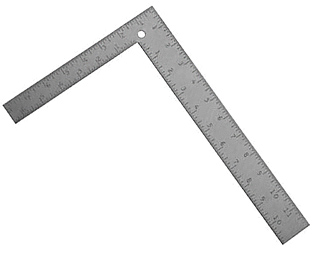
I thought the best way to proceed would be to cut the cross-comb between each bar, remove the bar and cut the unwanted comb off.  So I removed the spacer between the last two combs and discovered that my knife would not reach far enough.  I went into the kitchen, picked out our longest knife and went back to the hive, only to discover that this knife wasn't long enough either.  What did I have that was long, thin and rigid?  I thought of my steel square.   Since it is largish, I was afraid it might be awkward. I went into the garage and there saw my carpenter square.  This looked perfect.  The rule slides out.  And it worked!  It would reach all the way to the bottom of the box.  I gingerly slid it between the frames to cut the cross-comb... and surprise!... the comb just broke away.  It was not firmly attached to the vertical combs so I was able to break it off using my rule, hive tool and hands.
Here is how it looked after:
Cross comb all gone!
I looked at a few more bars.  There are 21 bars altogether.  Starting at 17 there were at least four combs of capped honey.  I looked no further. 
Olea's hive looks like it's doing well and I anticipate a honey harvest from it.

Monday, August 12, 2013

Addendum to today's blog

Kathy Niven wrote back and pointed out what should have been obvious.  If I don't want to take a chance on losing the original queen, I should remove the other queen cells.  So, just now, I hopped into my bee suit and opened the hive.  I thought I remembered which frame I had just placed.  (Another obvious idea:  mark the frames that are special.)  On that frame I saw a queen that looked like the one always there- fat and golden.  There were no queen cells at all.  So I looked at all the frames- no queen cells.  So the workers had already dismantled the cells, which must have been empty.  I can't know if they hatched, hatched and were killed, killed before hatching or hatched and alive, either not being seen or out of the hive mating.  Only time will tell.

It only looks like I know what I'm doing

Hive 3 just didn't seem to getting more populous.  There were only small areas of brood.  I learned that the queen will only lay if a number of eggs appropriate to the number of bees to nurse them.  At the end of July, after returning from the conference, I decided I needed to add more bees to the hive.  I have done this before, adding a frame of brood with its attendant nurse bees.
I hadn't been smoking my bees recently.  I wanted to do it this time because I anticipated that I would be disturbing them more than usual.  I had no pine needles and had used up all my  smoker fuel.  Not wanting to drive out to gather pine needles, I looked around the yard for something to use.  First I tried oak leaves- they didn't work.  Next was raspberry leaves- no good, either.  I came across dried and matted petals from Cecil Brunner.  These worked great.
I went into hive 3, spotted the queen and took out two frames from next to the small amount of brood present (two just in case found lots of brood in #1). In the strongest hive, #1, I went directly to the bottom box where I found only a little capped brood, some larvae, no eggs, no queen and lots of drones, even a drone hatching.  So I looked into the top brood box (after replacing it, of course).  There was capped honey, the queen and a few frames of brood.  I selected a good frame of brood and nurse bees and, after making certain the queen was not on it, placed it in a cardboard box that I had earlier fixed with wood scraps and duct tape to hold frames upright.
I sprayed the transfer bees with my home-made honey-b-healthy and placed the frame into #3, replaced the second frame and closed it up.
I felt like I knew what I was doing! Until...
I wanted to give #3 another frame.  I had looked in #2 a few days after the first transfer.  I didn't think it was strong enough to donate any brood.  A few days ago, I went back into #1 and took a frame of brood as before.  As I  was placing it into #3, I saw two capped queen cells on it, near the bottom, like swarm cells.  I  hesitated- should I squish the cells, put the frame back into #1 or nothing.  I just went ahead and put the frame in.  Now I wonder what will happen when the queens hatch, or will the reigning queen kill them first.  I wrote to Kathy Niven to ask her opinion.  I figure I should leave the hive alone for a couple of weeks and then take a look.  The queen in #1 is small and dark.  If one of her daughters takes over in #3, perhaps she will also be either smaller or darker and I'll be able to tell the difference.  I hope it wasn't a big mistake to put that frame in.  All we can do is wait.

Wednesday, August 7, 2013

Treatment-free Beekeeping conference

At the end of last month I attended the titled conference in Oregon.  This link is information regarding it.  The talks seemed to be mostly for larger operations than mine, but I learned a lot by talking with other backyard beekeepers.  It seems that many of us have made the same mistakes along the way.  
One of my personal high points was meeting and talking with Tom Seeley.  I asked him about the technique for marking the thousands of bees in his artificial swarms.  Here is the picture if you don't remember.  He would cool a few bees in a baggie in the refrigerator, then place them on blue ice and glue on the tag, one-by-one.  What a job!
For one of the workshops, Prof. Seeley had made an artificial swarm.  I was able to see the scout bees doing their waggle-dance.  The next day, the scouts had decided on a site, had stopped dancing and were making a piping sound that lets the swarm know that it's time to get ready to go.  This is the only recording of the piping I could find.  The piping occurs at about 5:25, maybe other places, too.  The bees started making their buzz runs indicating they were about to take off.  I waited to watch, but my ride was waiting and I had to leave.  The swarm probably took off soon after I left.  This link is to a facebook page for the conference that has a picture of Tom Seeley, Kat Nesbit (conference organizer) and one of the speakers in front of the swarm taking off.


Monday, August 5, 2013

Are you still reading this?

I'd like to know from you, my audience, if I should continue posting this blog.  If you'd would enjoy further posts, should I make any changes?  Fewer links?  More videos?  Any suggestions?  Let me know soon.  Thanks
The apiary on July 31

Wednesday, July 17, 2013

Vacation over

After returning from our trip back east, I was anxious to get a look into the hives to see what the girls had done in the two weeks we were gone.  If my vacation is over, so is theirs.
The plums had ripened in our absence and many had fallen to the ground.  I was surprised to see the bees all over them.  I think they were sucking the juice rather than eating the pulp; they ignored the older plums.

I took a look into the hives on sequential days and put in sticky boards for a mite count.
Hive 1:  There was no honey in the top super, but the other super was very heavy, maybe 30 pounds.  The top deep box was also pretty heavy but I didn't inspect it.  I switched out the drone frame.  There were drones hatching as I watched.
Hive 2:  No honey in super.  There doesn't seem to be much new comb being drawn.  The hive looks healthy but nothing is changing- the population seems static.  Switched out the drone frame.
I looked at about 10 pupae and saw no mites other than one that was on top of a capped cell.
Hive 3:  There was no brood in the top box (there had been before).  There was capped honey around where the brood had been and some nectar.  There was still empty foundation on the peripheral frames in both boxes.  I spotted the queen.  There were 4-1/2 frames of capped brood, but this colony doesn't seem to be growing either.  I'm wondering about it making it through winter.  I'm thinking about how to deal with it; feeding, combining hives, sink or swim?
I took the sticky boards out after 4 days and the counts were high- 102,22,32- and I decided to treat all three with formic acid (mite away quick strips MAQ).  What a job that was.  One lesson I learned is that this kind of work would be a lot easier with 2 people.  I also learned that it's a good idea to follow instructions.  The packs have a picture of scissors pointing one way, and I didn't think it mattered which direction one went... until I went the other direction.  The formic acid pads have a paper wrapping around them that helps control the rate of evaporation (I think).  I discovered that this wrapper is open at one end and cutting the plastic pack open the wrong way also cuts and tears this wrapper.
I put one pad in #3 because of the small number of bees.  In the other hives I put the recommended 2. The pads are laid on top of the frames between the two deep boxes.  The bees make brace comb in this same space.  I tipped the top box up to expose the bottom and scraped off the wax.  Then I scraped off the wax on from the tops of the other frames.  Even doing that, the boxes in #1 didn't fit together properly and I had to open it again and scrape off more wax.  Then I just pressed down hard on the boxes to close the gap between them.  I still don't know what I'm doing.
The next day there were a lot of dead bees on #2 porch and inside under the lid.  This is the one that had the damaged paper wrapper.
Earlier the porch was carpeted with corpses

Under the telescoping lid
I hadn't had this problem with previous use of MAQs, but apparently this is not unheard of.  Today there was lots of activity around the hive, so it looks ok.
Here is a video of wash-boarding from a couple of weeks ago.