Saturday, December 9, 2017

Pry scale, part IV, redux

I used the pry scale today: #1-45 lbs; #2-45 lbs; #3-39 lbs.  Afterwords I decided to spiff up the scale a bit.  I took off and shortened the lever and used a router to round the edges.  When I took of the pulley arrangement in order to round the edges of the base, one of the end pieces fell off.  The cutting board, from which the base derived, had been held together with a tongue and groove joint.  I suppose that the pressure from levering was too much for the tongue.  So now, I needed a new base.
Looking around for a plank 6-inches wide, I thought of the old planks from the fence.  Although quite weather worn I was certain one would suffice.
Some sawing, drilling, re-drilling, adjusting, sanding and screwing, et voila!

Note my fine routeing on the lever
This model also works and is a bit lighter. 
THE END
(I hope)

Friday, December 8, 2017

Pry scale, part IV


 I realized that the lifting bars had to be more rigid and figured that attaching an iron strap would do the trick.  But how?  Welding would be the best.  Hmm.  There is a fellow at pickleball player, Gary, who really likes to make things.  I had told him about the pry scale because it is just the sort of thing he likes.  I asked him if he had welding equipment, and, of course, he does.  And he wanted to work on the scale
Gary from a pickleball club photo
I gave him the scale and he returned it today.

A closer view of Gary's work
I had to do some adjusting of the string and then went to try it.
SUCCESS!
I plan to do a little work on the scale, such as rounding the corners and edges, shortening the lever arm and maybe making a handle.
Now to start weekly weighing.

Tuesday, November 28, 2017

Pry scale, part III

I thought I had it working this time.
I disassembled the T-shaped pry scale and reassembled the first model, this time with broader pry bars.  This necessitated drilling a couple of more holes in the wood and through the metal bars.

I cut a notch into the dowel that holds the scale to keep the scale from slipping.

Next, I had to provide a rigid lifting bar.  I looked into my odd and ends and found some metal shelf racks.  I cut them to 16-1/4 inches (the width of the hive) and cut a notch in the center wide enough for the pry bars.
Unfortunately, the notch made the bar too flexible.  Fortunately I had the narrow metal strips from the first iteration.
This made the bars unbendable....at least in vitro.  I removed the shims from under the hives and put the lifting bar in place.
Now for the test:  it sort of worked.  There was still some give in the lifting bar.  I had to press the lever to its limit to lift the hive and the hinged piece hit the pulley.  This gave an inaccurate weight of the hive.
I tried putting a screw below the lever to limit its downward arc, but this did not solve the problem of the flexing lifting bars.
I have more ideas.  Stay tuned for the further adventures of Pry scale- part IV.

Saturday, November 25, 2017

Pry scale, part II

I came up with a few options on how to solve the problem:  I could re-enforce the strip of wood that was flexing or I could lift from the sides of the hive that are already rigid.
I could not think of an easy way to re-enforce the wood strip, so opted for lifting at the sides.  Of course, the force of lifting had to be down, against the hive stand, not up against the flexible wood.  I wanted the lever to be on top, so this entailed a couple of more pulleys to redirect the force on the hinged middle bar.
Plans for second pry scale attempt
The shims needed to be moved laterally to make room for the lifters.  The side rails of the hive are only 3/4 inches wide, so I had to be careful giving enough space for the lifters.  Another trip to the hardware stores for more pulleys and stronger metal strips for lifting.
A bit more time in the garage sawing, drilling, adjusting, et voila!, a new pry scale.


The pulleys underneath
Off to the hives for a field test.....Failed!  The thing just did not lift the hives.  It may be that this special non-stretching sailing line actually stretches too much or that the lifting bars are not strong enough or some other malfunction.
This is becoming my great white whale.
Stay tuned for Pry scale, part III

Wednesday, November 22, 2017

Pry scale, part I

There are many reasons to follow the weight of the hive.  Basically, it is a simple way to monitor the health and activity of the hive. There are also a multitude of ways to do it, from low tech, such as lifting the hive onto a freight scale, to high tech electronic devices.  And then, of course, is the multitude of homemade devices.  I would have liked a fancy, easy to use electronic device but could not justify the expense.  I decided to make a pry scale.  I used this blog and this YouTube as my guidelines.  Of course, my hives' set-up is not the same as others and the lifters needed to be longer.  These are my detailed plans.
The parts were assembled by means of a few trips to three different hardware stores as well as digging through my collection of wood scraps and nuts and bolts.  I got the Dyneema string at West Marine, where I was not charged because I had had to wait way too long.  I got the scale on line.
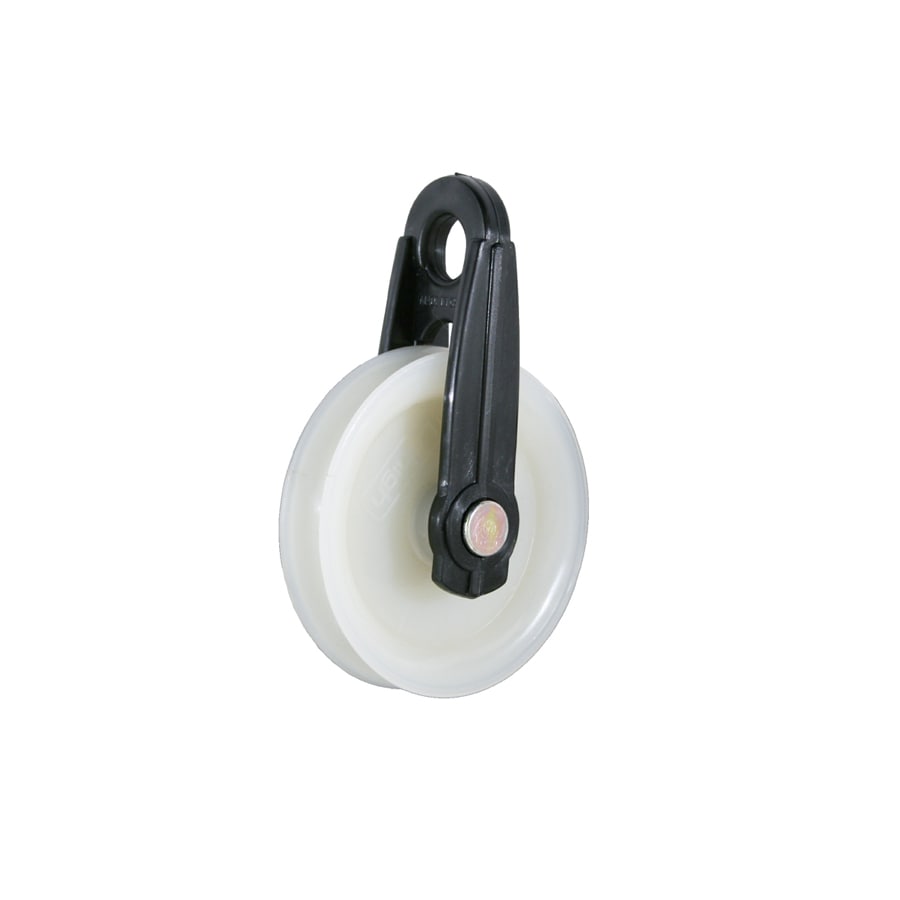
Then to build it.  First, without measuring, I used one of the hinges to determine the size of the hinged piece and cut it out of an old cutting board.  The pulley was a clothes line pulley and I had to drill and punch out the plastic bracket.  The 
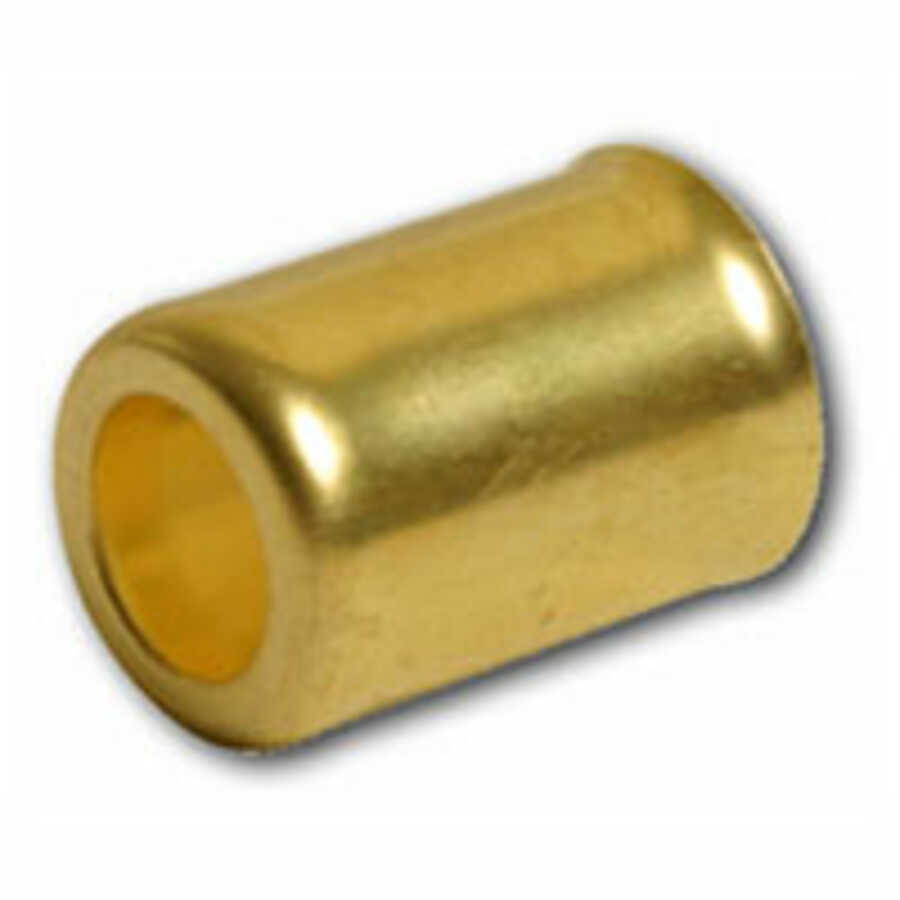
angle braces had to be far enough apart to allow the hinged piece to move so I made spaces with flat plumbing washers and some sort of ferrules I had from a long forgotten job.

Then I laid out the pieces on an old cutting board and marked where to drill holes for the bolts.  I used the drill press I got from my father.  I also had to drill extra holes through the hinges for the lift bars.
Here is the finished product:
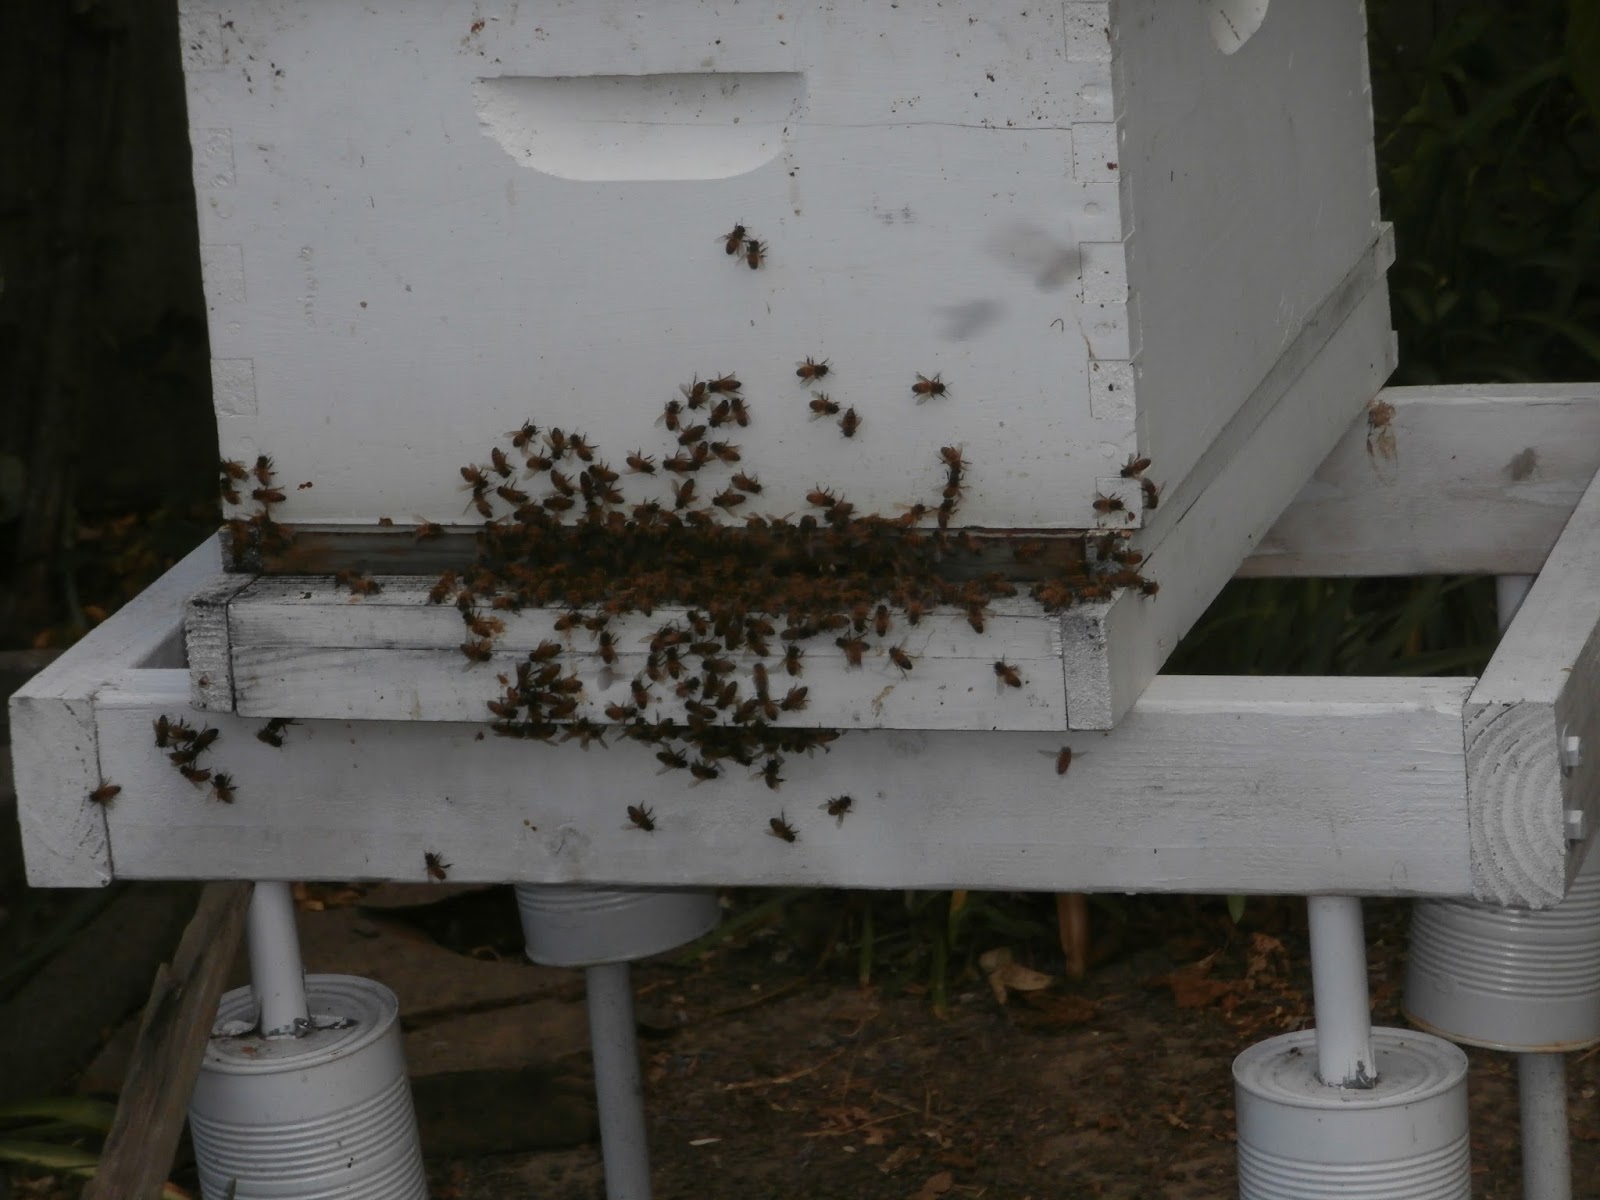
The lifting bars required a space between the frame and the stand which I accomplished with 1/4 inch shims cut from another scrap of wood.
Shim in place
Space for lifting bars
Now for the test........
Pry scale fail!
The device worked, however the piece of wood above the space is not rigid enough and would flex and the lift bars were not strong enough and also bent.  Back to the drawing board. 
Stay tuned for Pry Scale, Part II.

Sunday, October 22, 2017

Reducing hives

There has been a bit of hive maintenance since the last post.
At the beginning of October, I replaced the Apiguard trays.  The first ones were nearly empty and I placed the remainders in the new trays.  I noted that each hive had frames filled with uncapped (sugar?) honey, so I took out the feeders and in a couple of weeks will check to see if they need to be fed.  I took a look into Olea's and there were bees all over the pollen patty.
On the 14th I went into the hives with Matt.  The plan was to remove the Apiguard and check food supplies.  None of the three hives had enough bees to cover all the frames.  I realized that they all needed to be reduced to one deep box.  
In #1, we saw the queen and brood in the top brood box.  We also saw a bee bringing in propolis on her legs- a first for me.  There was some honey in the brood boxes, but the bottom box was mostly empty comb.  We took a peek into Olea's and all that remained of the pollen patty was some chewed up wrappings.
Over the next few days, I put the escape board in below the super, then removed the super from each hive.  There was honey in all of them, mostly unripe and probably from the sugar syrup.  I wondered what to do with it:  1.  Extract it and feed it back to the bees.  No, too much work and then what to do with the stickies.  2.  Put the super on the single deep box and remove it when the honey is gone.  No, no guarantee they will eat it all or not make more and then what do I do when spring comes.  Remember, this "honey" is from sugar syrup.  3.  I finally just put the supers and all other frames with honey out on the potting table.  Let the feeding frenzy begin!  And hope that it does not trigger robbing.  There is a lot of fighting around the frames.  I suspect that is because it comes from a particular hive and the bees think it is theirs.
The feeding frenzy beginning
The carnage below, dead bees, fighting bees and wax debris
Then it was time to reduce the hives.  With each hive, I had to find the queen to make sure she stayed in the hive and select which frames to replace in the box that would stay.  Naturally, I chose frames with the most resources (honey or beebread) and any that had brood.
It was hot, so I rigged an umbrella so in order to not get over-heated.
Another sunny fall day
The umbrella helped keep me cool
The job was easier than I had anticipated.  I found the queen in the top box, removed the bottom box and put the erstwhile top box onto the bottom board.  Then I chose which frames to switch out.  Then I shook all the bees into the one box.  There was some bearding because of the heat.
#1 reduced

Over the next couple of days I performed the same operation on #2 & 3.  I did not see the queen in #3, but I am certain she is safe in the bottom box.  That is where all the brood was, I definitely did not see her in the top box and I shook all the bees into the bottom box.  
#3 actually had a fair amount of honey in the deep boxes, more than I could put in the box.  I had to take a couple of frames with uncapped honey to the feeding station to be cleaned up.  This hive will not need to be fed, probably all winter.  I will keep an eye on it; after all, I do not want them to starve.
I went into Olea's to reduce it,   but took out only 3 bars.  The ones I left had a 2-3 inch band of capped honey at the top and I decided to just leave it since I can not feed that hive.
I have fed hives #1 & 2 with syrup again over the past three days.  I will check on them again in a week or two.
I now have 30 deep frames and 30 medium frames to freeze and store.  I can only fit 2-3 in our freezer at a time, so this will take some time.  Another winter task is hive stand maintenance, but I will write about that another day.

Thursday, September 28, 2017

No drones in Olea's

Today I went into Olea's, all the way to bar 7.  Despite the 80+ degrees, it went smoothly without the previous messiness I had encountered.
The number of bees in the colony is subjectively diminished.  There is a 1-2 inch band of honey at the top of bars 12-21, maybe enough for the winter but definitely not enough for a harvest.  There was also a fair amount of unripe honey.
So I wonder, if these bees are finding enough forage to store honey, why am I feeding hives #1-3?  I finished feeding them the last batch of syrup today.  I plan to go into the hives in 3 days to replace the Apiguard, so I will also take a look at their honey stores.  They have received over 50 pounds of sugar.
Back to Olea's-  There was a small patch of capped brood on bar 12 and then brood and young larvae all the way to bar 7, where I stopped the inspection.
I saw no drones and there was no drone brood.  The cells where drone had been raised (the cells are larger),were being filled with unripe honey.
I also saw very little pollen, so before I closed up, I fetched a pollen patty and stuck it in the back below an empty bar.

Saturday, September 16, 2017

The bees are buzzing!

There were a couple of projects to do today.  I wanted to put the Apiguard in the hives and take off the extra supers of #1 and 2.  Things went smoothly.  However, when I went to put the supers in the shed, I saw that one had some uncapped honey.  I decided to leave the super out for the bees to eat.

There were bees flying all over the yard, even around the deck by the trellis.  Then I what they were doing.
 
There was still a lot of buzzing in the yard and I saw it was coming from #3.
By the time I finished with these videos (it took quite a while to edit, save and upload), things had quieted down.
A few bees still looking for honey
 

Hive #3's entrance


Friday, September 15, 2017

Today in hive #2

Dinah and I went into #2 this afternoon.
As with #3, there was little honey stored, so I will remove the empty super.  This hive still had a fair number of drones running about, no drone corpses on the bottom and a handful of drone brood. 
We saw an open queen cell in the top brood box.
Even though the focus is bad, you can see this is chewed open at the bottom indicating that a queen has emerged.  You can also see that this is at the bottom of the frame, therefore a swarm cell.  I conclude that this is the hive that swarmed at the end of August.  (By the way, the swarm died in the nuc.)  We looked for the queen but did not find her.  I did see some larvae, and better yet, cells with royal jelly in the bottom.  That means that there have been eggs laid in the past 1-3 days, a very good sign.
I then did an alcohol wash, making quadruply sure that the queen was not on the frame.  The picture below speaks for itself.
Tomorrow I will treat all three hives with Apiguard.

Wednesday, September 13, 2017

Piles of drones

I went into #3 today, primarily to see if there was enough honey stored for me to be able to take some- there was not.  But here is what I did see.
The top super had no honey nor any new drawn comb.  I will take it off the hive tomorrow; I placed the escape board under it when I reassembled the hive.  The lower super had  both capped and uncapped honey, maybe 2-3 pounds.  Remember, the bees need about 40 pounds to get through the winter.
There was brood in the top brood box and I even saw some eggs.  Of note, there were subjectively a lot fewer drones about and only a small area of drone brood.
I spotted the queen in the bottom brood box.  There was some brood in the bottom but I only looked at about half the frames.
What was especially interesting was what was on the bottom of the hive- piles of dead drones!  (Sorry, I did not have my camera with me this time.)  This is the time of year when the workers start evicting the drones; their work is done for the year and now they will just use up precious resources.  I think the workers stop allowing them to eat, so they starve.  The undertaker bees must be finding it difficult to keep up, hence the piles of corpses.  I expect that if there were not so many yellow jackets scavenging around the apiary that I would see many more drone corpses on the ground.
I am considering the need to feed the bees because of the surprising lack of honey.

Tuesday, September 5, 2017

Thursday, August 31, 2017

A late August swarm

We had just returned from an overnight with Julie and her children (a lovely time was had by all) and I looked out at the yard and saw bees flying around an unusual area, between the plum tree and the roses.  I went to look and saw a small cluster on one of the rose bushes (Elina, to be precise), only a dozen or so feet from the hives.
The swarm on the rose bush
I prepared a nuc to capture them.  Swarms this late in the year have a very low chance of survival.  This is because the honey flow is over so they cannot collect the necessary resources to survive. (Resources for bees, that is.)  Also. this swarm was quite small without enough workers to collect what is there.  I pondered my choices: let them alone and sink or swim; collect them and feed them until spring; collect them and add some bees and brood from another hive; collect them and give them some frames of honey.  I decided on the last choice.  It was pretty hot, so I chose to wait for it to cool down.  The cluster was being harassed by yellow jackets, and about an hour later, I saw the swarm on the move. 
The same bush, one hour later
I followed the bees to where they had clustered on my neighbors lemon tree
The cluster was a bit bigger than my fist.  I shook them into a nuc box where they spread out on the bottom and sides.  I looked for and spotted the queen.  By the time I got the camera up, the bees had covered her.
The queen is under all these bees
I do not know if this is clustering of if they are balling her.  I certainly hope it is the former.
I now went to get the frames of honey from the other hives.  I looked in both deeps of #1 and #3 and found no frames of honey.  Bad news for the planned fall honey harvest!  Now I will wait until spring and collect any honey left in the supers. 
How to feed the bees in the nuc?  I really did not want to feed them sugar water all winter long and perhaps they just need some to get them established.  I had some containers of honey soaked cappings from last year's harvest.  I smeared this onto a frame and put that into the nuc along with two frames of drawn comb (one with some old bee bread) and two foundationless frames with hand-sized drawn comb.
Honey soaked cappings smeared onto frame with some comb
I am pessimistic regarding the swarm's survival, but one never knows, do one?

Wednesday, August 16, 2017

Can you count the mites?

I took the MAQs out of the hives today.  Just for the heck of it, I examined the trays for dead mites.  I had scraped the trays clean when I had put in the MAQs.
What a joy to see all the corpses.  This is just a small, representative section.

Thursday, August 10, 2017

Olea- come and get your hive!

Nothing personal, Olea, but your hive is causing me tsoris.  Although the philosophy behind top bar hives is compelling, the actual management is far from easy.
Top bars are supposedly more natural because the bees build comb without a frame or foundation.  Old wax is not reused, which is better for the bees.  They do not require any lifting of boxes heavy with honey and stay at a workable level.  Many of them have windows allowing for observation without opening the hive.  They are less expensive and are easy to build.  Yes, this is, and more, is all true.  However....
Inspecting the hive is exponentially more work than inspecting a Langstroth.  Each comb must have any attachments to the wall cut free.  Some of the cells thereby cut are filled with honey.  Soon there is honey all over the hive tool and my hands.  And of course, the tool and my hands become covered with bees.  Despite best efforts, a bee or two or three will get pinched and reflexively sting me unless I wear my clumsy leather gloves.  (Two stings today, both on my right ring finger.)  Bees get caught in the honey and die.  It is difficult to treat for varroa. (At least with what I already have; oxalic acid is supposed to work.)  Bees get squished while freeing the comb.  Bees get squished when replacing the bars.  And I have yet to harvest any honey from this hive.
Olea's hive has 22 bars.  I inspected it today.  I want to see the brood area, which is on bars ~3-12.  However, I have to start at 22 and move down one bar at a time.  That's at least 10 bars that need to be moved just to get started with the inspection.  And each bar has to be freed and moved down.  The bees are getting more and more agitated because of all the freed honey.
Today I only got to bar 10 and never saw the center of the brood area.  I did find a large number of drones and drone brood on frame 14.  There was worker brood with a good pattern on frame 10, and when I saw that, I decided I had had enough for the day.
So, Olea, whenever you want to take your hive back, let me know.

Sunday, August 6, 2017

#2 inspection and alcohol wash mite count

Despite the heat, I went into #2 today.  This is the hive I under-supered 10 days ago.  And the one with the k winged bee.
Naturally, the top super was heavy and full of honey.  I only checked the outer 2-3 frames of the second super.  There was drawn comb and some honey, so the supply is still building.
In the top brood box, I spotted the queen.  There was a good brood pattern, too.  There was still a frame with drone brood.  Once again, I only looked at 5-6 frames. 
I did an alcohol wash mite count with the results in the picture below.
As you can see there is a dismaying number of mites- 26 to be precise.  This is way too many for entering the winter.  This is a good article explaining why.  So I need to treat and the question is when.  Most sources say to treat after the fall honey harvest and others say that here in mid-coast California, we should treat before mid-August.  I plan on treating now, tomorrow actually.  Each Langstroth will get 2 MAQs.  I will not treat Olea's.  One reason is that it is just too difficult.  (Probably the way to treat top bar hives is with oxalic acid dribble or vaporization.  I do intend to decide which method to employ and to get the supplies.)  The other rationalization is that it survived last winter, so by definition is a survivor colony.  By the way, Olea's population was diminished by swarming but now appears to have recovered with bees on all the combs.  Perhaps I will get some honey from it this year.
As a matter of housekeeping, let me know if you wish to continue getting this blog by email.

Thursday, July 27, 2017

Second supers and k wing and more

Two weeks ago I went into #3.  I was pleased at how gentle my bees are.  I had looked into another beekeepers hive a day or two earlier and now I know what a hot hive is.  His bees were pinging us immediately upon opening, and Terry, who had on cloth gloves got stung several times. When we were done, the bees still came at us even when we were nowhere near the hive and I got stung on the cheek.
#3 looked very healthy.  The super had honey and a small patch of brood.  There was a lot of brood in the brood boxes as well as many empty queen cups.
Today I looked into #2.  The super was heavy and there was uncapped honey in the side-most frame.  I saw brood and eggs in the top brood box.  I also saw one bee with k wing deformity in the hive.
K wing deformity.  Not my picture
This can be a sign of tracheal mites. The best I can tell from my sources is that there is no need to treat now.  If I see a lot of crawlers with k wing, then I will.  Fortunately, formic acid is a good way to treat and, as you all know, that is what I use to treat varroa with MAQs.  It is likely that I will be treating in the fall.
I put supers on all three hives.  For curiosity (and because I had already removed the super in order to get to the brood box) I put the new super below the old one- bottom-supering.  The super on #1 had mostly drawn frames with some old honey and pollen in some while the super in #3 has all new frames.
I successfully moved the water source to my desired location by moving it 1-2 feet at a time and the bees are still going to it.

Friday, July 7, 2017

They like it!

Although one can not see them all, there are 10 bees on the rags and 3 or 4 flying around.
I have managed to move the station about 3 feet closer to its final destination.