Sunday, December 29, 2013

Hive #1 on a warm winter's day

Hive #1 has been looking very busy and I have been wondering what was going on inside.  Today it was warm enough to allow me to take a look.  
Busy front door
After taking off the lid, I was pleased to see a lot of bees inside the top cover.
Inside the Vivaldi box
In the super, there was only a bit of honey.
Under the Vivaldi box- top of super
 If a hive is really strong, all the frames would be covered with bees.  The top brood box had a small patch of brood at the bottom of the center frames and a few frames with capped honey and bee bread.  I guess the colony is not as strong as I thought since there was only a handful of bees on top of these frames.
Top of upper brood box
The bottom brood box had old,drawn comb, no brood or honey.  I didn't see the queen and assume she is in the top brood box.  At least I hope she's there still.
Looking down on bottom brood box
I've treated myself to a new tool, a frame puller, and used it today for the first time.  It really makes it a lot easier to remove a frame.
Using the frame puller
I received and put together the frames that I needed for the nucs.  I made them foundationless by putting the wedge sideways, using glue and a stapler.  As I pull brood and honey from the existing hives for splits, I'll replace them with the foundationless frames. 
Foundationless frame
Close up of my fine work
I used a maroon crayon
 I marked them with a crayon to keep track.


 A few weeks ago, bees were drinking water off the deck.  The water was there from my cleaning the beer fermenter.  I had long ago made a water station by the blackberries, but the bees never drank from there.  I made a new "pond" for them behind the new rose garden.  I haven't seen anyone drinking there yet.


Sunday, December 15, 2013

New nucs built

This spring I intend to start some nucs in order to raise new queens.  There are many reasons for doing so as well as many methods.  One method is the "walk-away split".  Since this looks to be the simplest, I plan to do this.  Thus the need for nuc boxes.  Hive #1 seems to be the strongest, so I'll use it.  I can't wait until spring to get going.
I built the boxes using these plans.
The project went pretty well, just a few snags:  Karly helped me getting the sheet of plywood.  We tied it onto the roof of the Prius, but then realized we had tied the doors shut.  The printer did not print out the "1"s, so when I cut the pieces, I measured 9-1/8" instead of 19-1/8".  Fortunately, the remaining wood was big enough to cut all the parts.
All pieces cut and ready for assembly

The finished product

Saturday, November 30, 2013

Hives #1 and #2 holding their own, as well

A couple of days before Thanksgiving I looked into hives #1 and #2.  #1 seems to be the strongest of all with lots of bees.  There is even some nectar in the cells in the super.  The queen was seen in the top brood box with some brood.  The bottom brood box is mostly empty comb.  As I recall, the queen has always been spotted in the top brood box, although I have seen brood in the bottom box before.  Since this hive is so strong, I'll take brood from it (in the spring) if #3 needs help.  I'm also planning on trying to raise a queen, and I'll use #1 for stock.
#2 seems stable with a modestly sized colony.  I spotted the queen in the bottom box.
I put entrance reducers into both hives.
Hey! What happened to our door?

Thursday, November 21, 2013

Hive #3 seems to be holding its own

I took a look into #3 a few days ago.  There was clear nectar in some frames in the top box, presumably from the sugar syrup.  In the bottom box were smallish patches of brood on two frames, much as I had seen on previous inspections.   There was a good amount of beebread.  I saw the queen, again.  The population seems about the same size, which is better than declining.  I hope that in the spring the size of the colony will rapidly grow.  If it doesn't, I'll probably transplant a couple of frames from the stronger hives.
After we had returned from our trip, I scraped out the honey that remained in the extractor.  I left the barrel out for the bees to clean up.  The girls didn't find it until the second day, which was warmer than the day before.  Perhaps the warmth let the honey aroma spread.
Lots of bees visiting the barrel

Lined up around the pool of honey

Same view as above, 1/2 hour later.

Saturday, November 9, 2013

Back from abroad and some bad news


So there we were, at the top of Sacre Coeur on Montmartre in Paris, enjoying the view.  And there on the roof top below us....bee hives.
The day before we left, I noticed that there was decreased activity around Olea's hive.  I peeked through the window, and, yes, not many bees.  I then did a thorough search.  There were very few bees, spotty brood and dead pupae.
Dead pupae from Olea's hive


There was no bad smell and no goopy larvae.  Even though I was concerned that this might be foulbrood or some other contagious disease.  I did spot the queen after I nearly lost her by nearly dropping the frame she was on.  Since we were leaving the next morning, there was nothing I could do.  I did email Kathy Niven and got a response from her in Paris.  She didn't think it was foulbrood, so I was reassured even though I knew the colony was doomed.  Upon our return, I took a look at the hive.  On the porch was lots of debris.
Debris on the porch

Inside all the honey had been robbed, as anticipated.  The debris, which was also inside, is the chewed off caps of the honey.  The hive was otherwise empty except for two dead bees and a couple of robbers still looking around.  There was some (presumably) dead brood and lots of beebread.

Spotty capped brood

Beebread
Close-up of bee bread

I emailed Eric Mussen at Davis asking if he could identify the cause of death from my picture and description.  Of course he couldn't be positive but he suspected it may be chilled brood.  I can't explain what caused the drop in population that led to the death, but at least I won't need to sanitize the hive.
I tried to remove the beebread but it was just too tedious.  I do have a small amount;  it tastes somewhat sour and grassy with sweet overtones.  I will process all the wax.
I did use the honey extractor before we left.  It's not as easy to use I had hoped.  The problem is balancing the frames;  when it is off balance, the whole thing wobbles crazily.  We did get a few pounds of honey.  Yum!


Sunday, October 6, 2013

Honey extractor for retirement and nuc report

The people in Urgent Care threw a retirement party for me a couple of days ago.  It was at the Cypress Hotel and was very nice.  They gave me a 4-frame honey extractor, a very generous gift.
The extractor on its stand

Looking inside.  The mesh cage spins around fast spraying out the honey into the barrel.

This morning I took the captured swarm over to Bruce and Gregg's.  Last night when all the bees had returned to the nuc I had taped over the entrance.  We dumped the bees into their box, put in some frames and closed it up.  Sadly, Gregg called me this afternoon to report that all the bees had left.  Bees abscond when there is something they don't like in their environment.  Perhaps they'll make it until spring, but I think it's unlikely as swarms this late in the year have a poor chance of surviving.

Friday, October 4, 2013

Mites, nucs and escape board

Two days ago I did a sugar shake count in hives 1&2.  The results, 23 mites in #1 and 27 in #2 were way too high.  Yesterday I put mite-away quick strips in all three Langstroth hives (only one strip in #3).
The legs of the hive stands are in cans with motor oil in them, to keep ants out.  One of the cans had developed a leak.  Yesterday, when I had the hives open with only the bottom brood box on the stand (to put in the quick strips), I used my car jack to raise the stand high enough that I could slip a plastic container under the leaky can.

Down side of escape board
Close-up of maze

Up side of escape board with spacer strips added

I built a bee escape board.  This is used as a one-way valve to get bees off of the honey supers when harvesting.  They aren't very expensive to buy, but I wanted to save shipping costs.  Besides, it's fun to do it myself.  After it was built, I realized it needed more space between it and the honey super so I added spacer strips.
While I was finishing the escape board this morning, Mark Lemon called to say that his crew had spotted a swarm in Watsonville.  I had one 5-frame nuc box available, but only three frames, two plastic and one of my so-called foundationless frames.  I added two drone frames to make five.  I met Mark in Watsonville (after a couple of wrong turns on my part) and he led me to the swarm.  It was in a bush and about football size.  I got the empty nuc box under the swarm and shook the branch.  To my surprise, there was a hand-sized piece of comb in the middle of the swarm.  We know they were there for at least 3 days.  I expect that they hadn't found a home and were building an exposed hive.  In any case, I put the piece of comb in the nuc box, too.  I shook more bees off the branch in order to be certain I had the queen, waited about 1/2 hour for more bees to go into the box and then put the frames in.  I waited another 15 minutes, put the top on and taped it down.  It's now sitting in the backyard under the orange tree.  Gregg Polubinsky has expressed interest in starting another hive, so I'll give him the bees if he wants them.
Captured swarm nuc in its temporary, I hope, location

Happy new homeowners

Thursday, September 26, 2013

Honey harvest...kind of

One of two top bars of honeycomb
I went into Olea's hive today to take honey.  I had a big pot with a lid into which I would put the dark comb and a plastic lined wastebasket and a cardboard lid into which I would put the clean comb for comb honey. The wastebasket was the right size to hold the ends of the bars so the comb could hang vertically and not touch the bottom.   Only two bars had mostly capped honey.  There were two bars with comb and no honey and two bars without any comb.  The other three combs I looked at had only a little capped, mostly nectar and the last one had some brood, too.  I had planned to take only honey more distal than bar 12 (there are 21 bars), something I learned from Les Crowder.  I brushed the bees off the comb back into the hive and hung the comb in the wastebasket.  I then put the hive back together, rearranging the bars so all the comb was toward the front, one empty bar, then the back board.  I put an empty bar behind the backboard, as well.  I plan to cut the comb and put it into plastic containers- yum!
I took a quick peek under the Vivaldi box on #3.  It looks and feels like the bees are making some honey, presumably using the sugar I've been feeding them.  I still haven't figured how to get them through the winter.  I'm sure I'll have to feed them until the eucalyptus bloom in December.  I wondering if I should condense their space to one box or even a nuc.  I put the entrance reducer in place so they can defend better against robbers.  Now that the honey flow is over, the stronger hives could take advantage.
Entrance reducer in place


Monday, September 16, 2013

Some good news, some so-so news

Since the last post, I've been in each Langstroth hive once.
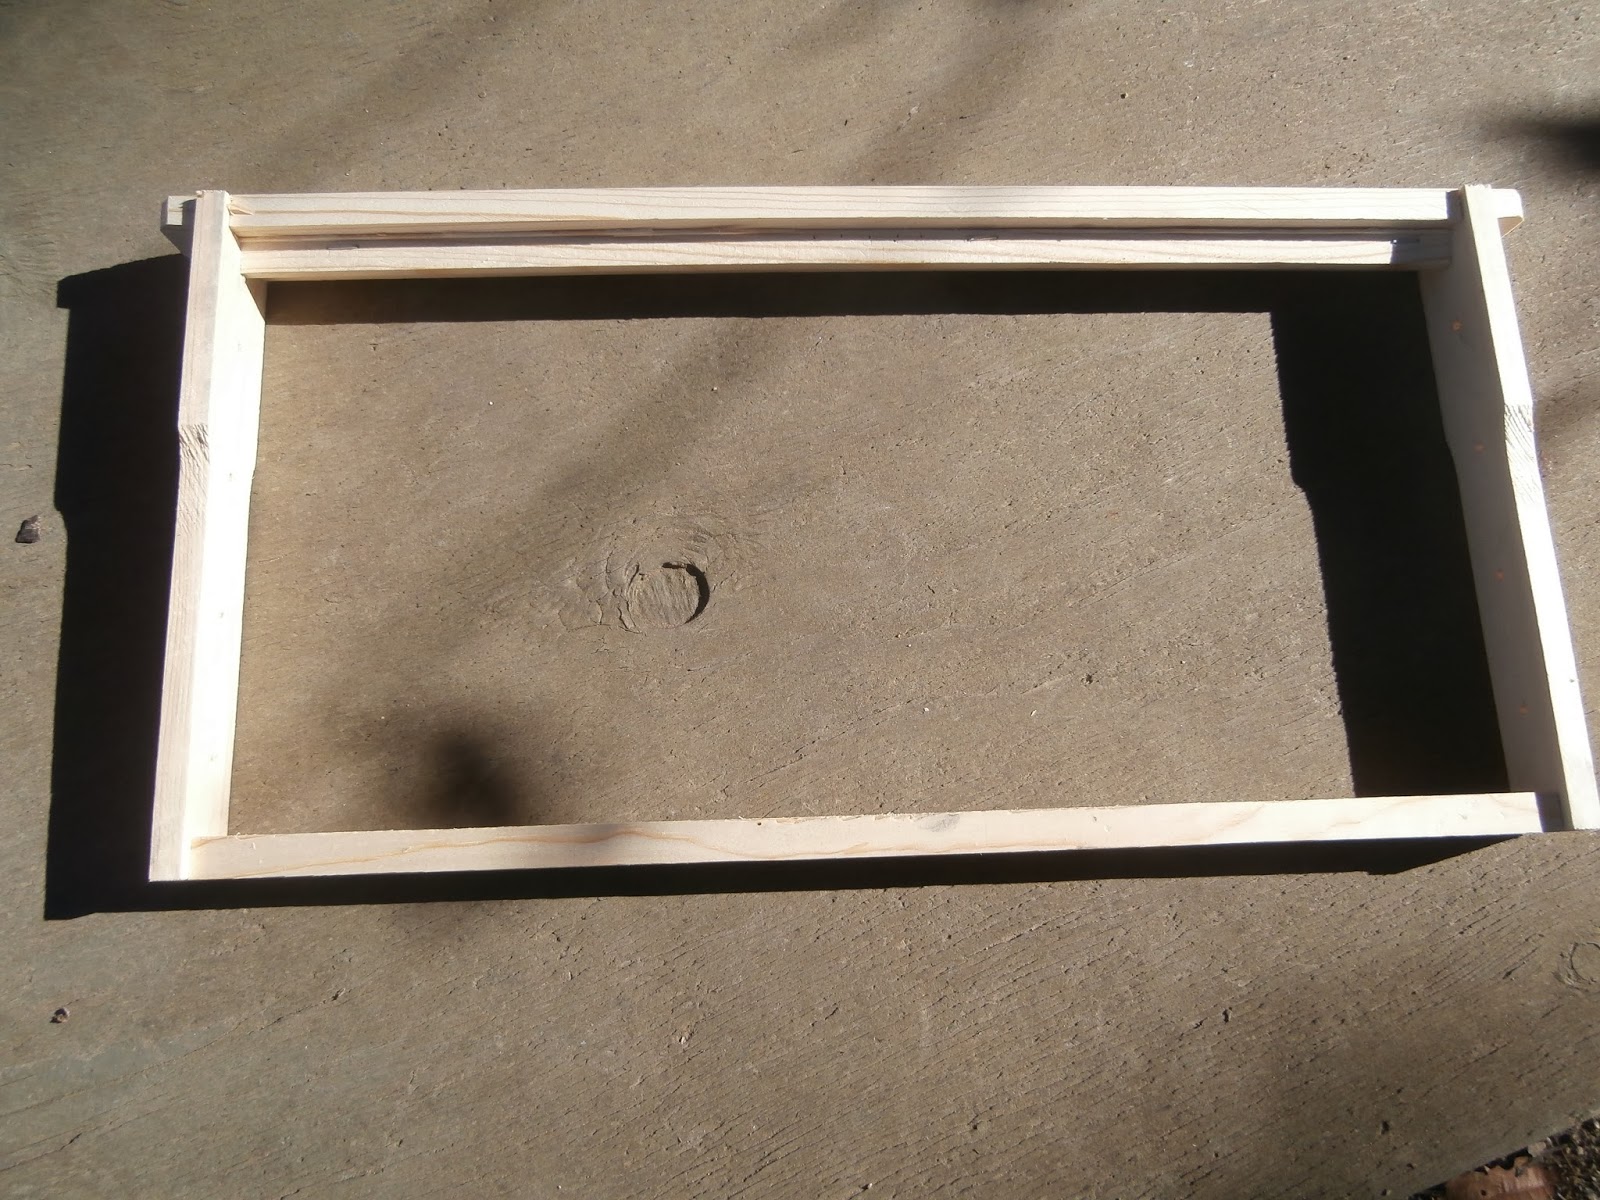
Frame of brood in #2
About two weeks ago, I opened #2 and, overall, it looked good.  In the super were two frames of capped honey and two frames with unripe honey (nectar).  There was some brood in the top brood box and some honey.  In the bottom brood box, I spotted the queen and four frames of brood. The girls still haven't drawn any new comb. Last time in, I had put in one of my 
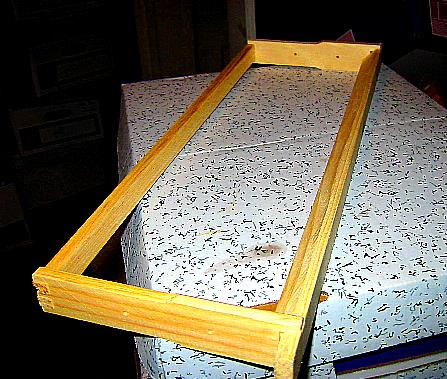
jerry-rigged foundationless frames.  Not only was no comb drawn, the bees had also removed almost all the wax I had  stuck onto it.  Also, in the last inspection I had moved a frame with old, black wax to the side and this time I took it out and replaced it with another one of my foundationless frames.  (At some point, I'll need to take out my jerry-rigged frames and place a 
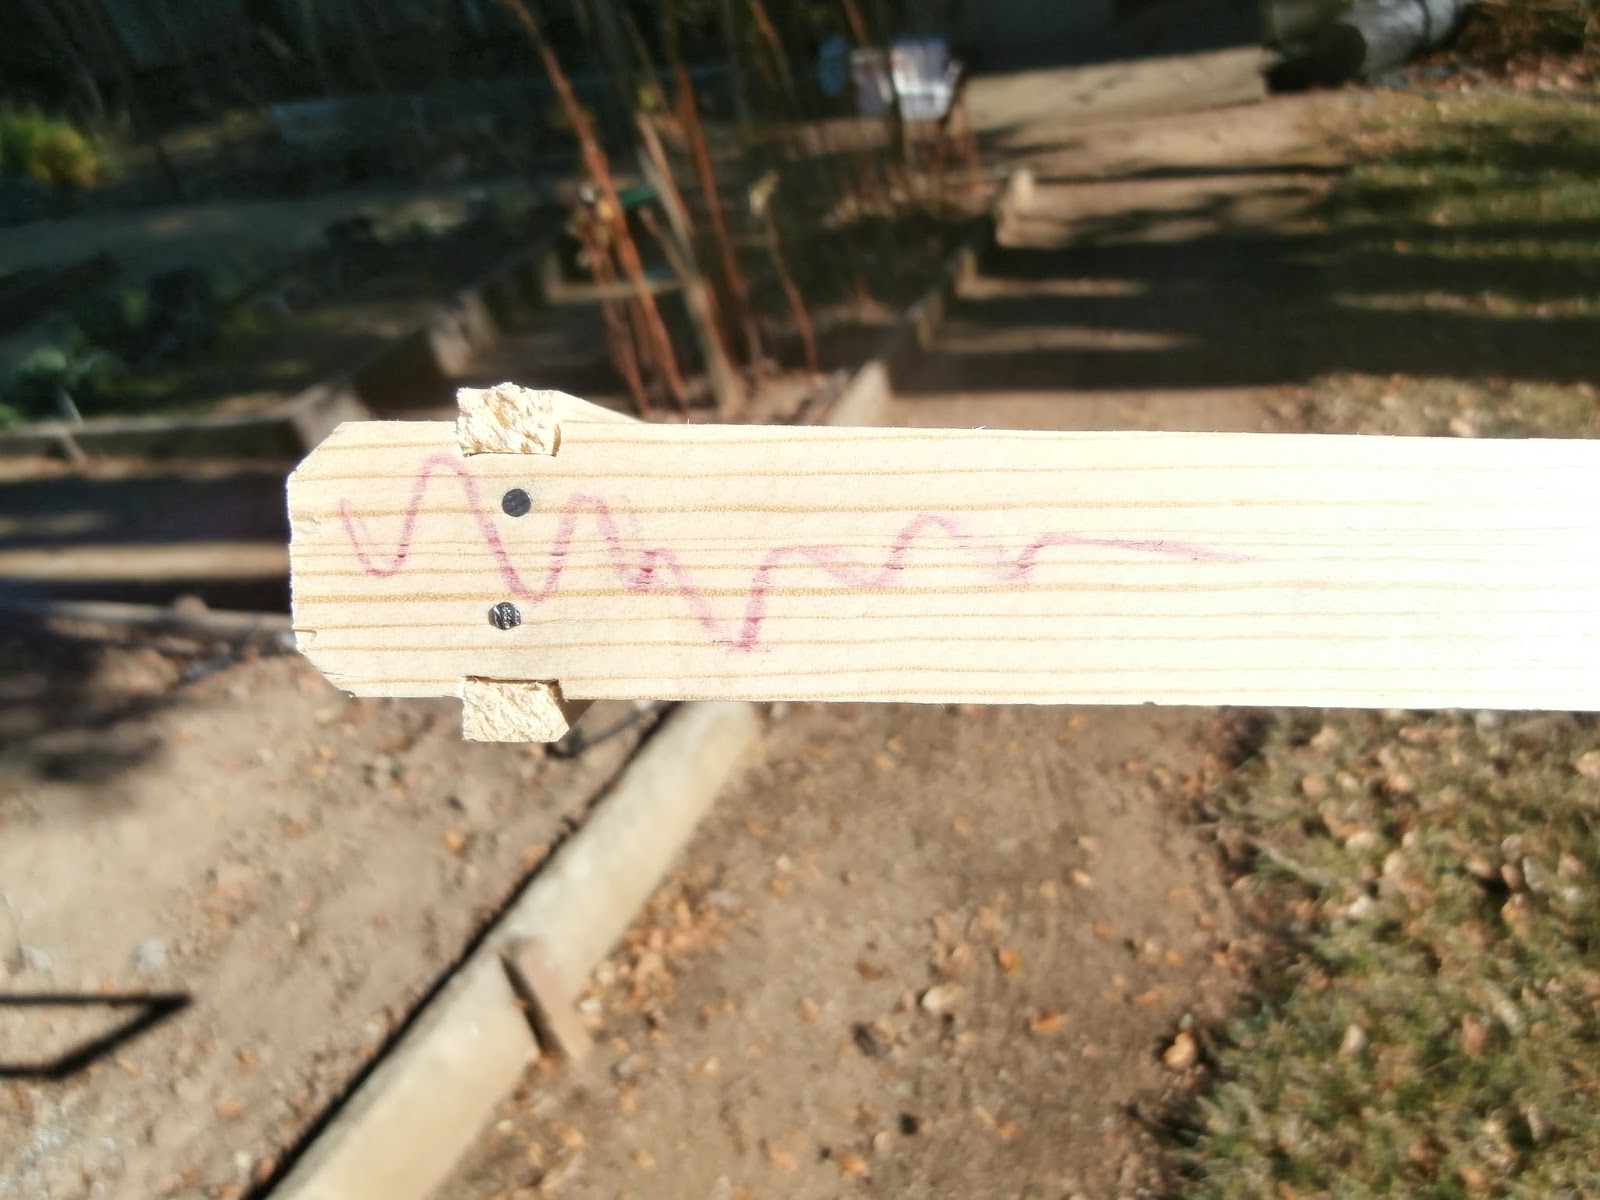
shim or wedge in the top groove like there should be for the bees to draw comb).  The old comb was in a frame with a wax foundation that came in one of the nucs I had purchased in the spring.  It was so dark that the sun barely shone through only a few cells. 
Old, dark comb
Mystery cups on the crossword
This picture is way too light, imagine it even blacker. When I broke it apart Iwas surprised to see small hard cups at the bottom of each cell.  I figure that this was the propolised feces and remains of cocoons from all the previous larvae/tenants of the cells. 
One of the cups in Karly's hand
Old comb broken apart and stacked
I intend to process all this wax by boiling rather than the solar melter.  I'll see if that method works well for old wax.
Yesterday, with some trepidation,  I looked into #1.  It was time to find out what had happened with the queen (refer to earlier blog).  I had been watching the entrance since last inspection and the amount of activity seemed stable.  However, it is common beekeeping knowledge that the colony can be dying in the hive and look normal from outside.
The first thing I noticed was that there were no longer a plethora of drones.  I saw this in the supers.  There was a lot of brood in the top box, and I spotted the queen.  As you can see, she is fat and golden unlike her small, dark predecessor.
Our new monarch
 I don't know if she was made from the frame I put in, or if the colony had already made a new queen via supersedure.  I may have inspected in the few day window in which the queen has hatched, mated and not yet started laying. 
Frame full of brood
 There was a lot of brood, and I saw some hatching.  Since it takes three weeks for a worker to go from egg to emergence, I knew that the queen had been laying for at least that long.  Even though I would expect a daughter of the old queen to be darker, the timing makes me think that the colony had taken care of matters on their own.
A new worker hatching


 There was some brood in the bottom brood box, as well.  I took out the drone frame and substituted a regular frame with foundation. 
I did get stung twice through my nitrile gloves.  Next inspection, I'll also wear a pair of exam gloves underneath.
I scraped off propolis, amassing a golf ball size hunk.  I think I'll get a propolis trap.

Today I went into #3.  The population still seems static.  I spotted the queen and 2-3 frames of brood in the bottom box.  No new comb, very little honey.  I decided to start feeding them in hopes of stimulating them.  Perhaps there's a problem with the queen, herself.

Sunday, August 25, 2013

Into the hive with Lia and Ken

Yesterday Lia, Karly's friend from Berkeley, Ken, our friend from Scotts Valley and I took a look into hive #3.  The population was not noticeably larger.  One of the brood frames that had been transplanted now had empty cells with some nectar.  We did spot the queen.  There was brood on  2-3 frames, capped and larvae of many ages.  We didn't see any eggs.  I took out one of the frames in the top box and replaced it with a foundationless frame.

Friday, August 23, 2013

Too many drones in #1

A couple of days ago I took a look into hive #1.  There were a lot of bees and the first thing I noticed was a large number of drones.  Lots of drones! Drones everywhere!  Maybe 50% of the bees were drones.  I didn't (don't) know what that meant, but I didn't think it was good.  Usually the drones make up a small percentage of the hive, maybe up to 20% at odd times.  All these drones might mean a laying worker.   This disastrous situation arises when the colony becomes queenless.  With out the suppressive pheromones, one or more workers' ovaries develop and they begin laying.  Since they haven't (can't) mated, all the eggs develop into haploid drones.  This is a very difficult problem to correct, and if not corrected, the colony will die.
I inspected the hive as thoroughly as I could.  I saw no capped brood, worker or drone.  I saw no larvae.  I saw no eggs.  I saw no queen, either.
Remember, this is the hive from which 12 days earlier I had taken a frame of brood to place in #3 and it had two capped queen cells on it.  I figured, then, that either the colony was getting ready to swarm or they were replacing their queen (supersedure).  It hadn't, to my knowledge swarmed, so what was going on?  Had a new queen been raised and not yet started laying?  Had a new queen died or been eaten on her mating flight?  Was there a laying worker?  What to do, what to do?
If there was no queen, perhaps I could take a brood frame from #2 with eggs or very young (<3 days old) and the workers would make a new queen.  So, that's what I did.
I put the top brood box back onto #1, opened #2 and found a frame with the youngest larvae I could identify- as usual, I didn't see any eggs.  I made sure the queen was not on the frame, sprayed the nurse bees with my honey-bee-healthy and placed it into the top box of #1.  I brushed all the bees off the comb of the frame from #1 and put it into the vacancy in #2.  Then closed everything up.
Did I even need to do this?  Will it work?  Stay tuned.  I'll give it a couple of weeks.

Thursday, August 22, 2013

Hive no. 2 is looking good

One frame of brood from hive #2
Five days ago I inspected hive 2.  It looks like its doing well.  There was lots of brood in both boxes, mostly in the bottom box.  I spotted the queen, too.  I took out the drone frame and replaced it with a foundationless frame that I had prepared it by removing the foundation from a frame and putting beeswax in the groove that held the foundation in the top.  Most foundationless frames have a wedge in the top similar to the top-bar tops.  We'll see how this works, like everything else.
There didn't seem to be any new wax drawn, but there were 2 frames with honey in the top box.  The hive looks healthy with all that brood.
I checked the drone pupae for mites.  Out of 17 pupae checked I found 0 mites!

Tuesday, August 20, 2013

Success with Olea's hive cross-combing

Earlier I had seen cross-combing on the distal combs in the top-bar hive.  It took form as a horizontal comb attached to the bottom of several vertical combs.  I expected that I would have to remove all the combs en bloc when it came time to harvest the honey.  At the conference I learned a bit more about top-bar beehives, and now, being an expert, I decided to take care of it now.
I was able to remove the back board and a couple of bars from the very back.  The back board was firmly attached with propolis and took a bit of work.  The last two bars had only a little comb and came out easily.  This is what I saw looking down into the box:
 You can see the horizontal comb protruding.  It crosses 3 or 4 vertical combs.
I thought the best way to proceed would be to cut the cross-comb between each bar, remove the bar and cut the unwanted comb off.  So I removed the spacer between the last two combs and discovered that my knife would not reach far enough.  I went into the kitchen, picked out our longest knife and went back to the hive, only to discover that this knife wasn't long enough either.  What did I have that was long, thin and rigid?  I thought of my steel square.   Since it is largish, I was afraid it might be awkward. I went into the garage and there saw my carpenter square.  This looked perfect.  The rule slides out.  And it worked!  It would reach all the way to the bottom of the box.  I gingerly slid it between the frames to cut the cross-comb... and surprise!... the comb just broke away.  It was not firmly attached to the vertical combs so I was able to break it off using my rule, hive tool and hands.
Here is how it looked after:
Cross comb all gone!
I looked at a few more bars.  There are 21 bars altogether.  Starting at 17 there were at least four combs of capped honey.  I looked no further. 
Olea's hive looks like it's doing well and I anticipate a honey harvest from it.

Monday, August 12, 2013

Addendum to today's blog

Kathy Niven wrote back and pointed out what should have been obvious.  If I don't want to take a chance on losing the original queen, I should remove the other queen cells.  So, just now, I hopped into my bee suit and opened the hive.  I thought I remembered which frame I had just placed.  (Another obvious idea:  mark the frames that are special.)  On that frame I saw a queen that looked like the one always there- fat and golden.  There were no queen cells at all.  So I looked at all the frames- no queen cells.  So the workers had already dismantled the cells, which must have been empty.  I can't know if they hatched, hatched and were killed, killed before hatching or hatched and alive, either not being seen or out of the hive mating.  Only time will tell.

It only looks like I know what I'm doing

Hive 3 just didn't seem to getting more populous.  There were only small areas of brood.  I learned that the queen will only lay if a number of eggs appropriate to the number of bees to nurse them.  At the end of July, after returning from the conference, I decided I needed to add more bees to the hive.  I have done this before, adding a frame of brood with its attendant nurse bees.
I hadn't been smoking my bees recently.  I wanted to do it this time because I anticipated that I would be disturbing them more than usual.  I had no pine needles and had used up all my  smoker fuel.  Not wanting to drive out to gather pine needles, I looked around the yard for something to use.  First I tried oak leaves- they didn't work.  Next was raspberry leaves- no good, either.  I came across dried and matted petals from Cecil Brunner.  These worked great.
I went into hive 3, spotted the queen and took out two frames from next to the small amount of brood present (two just in case found lots of brood in #1). In the strongest hive, #1, I went directly to the bottom box where I found only a little capped brood, some larvae, no eggs, no queen and lots of drones, even a drone hatching.  So I looked into the top brood box (after replacing it, of course).  There was capped honey, the queen and a few frames of brood.  I selected a good frame of brood and nurse bees and, after making certain the queen was not on it, placed it in a cardboard box that I had earlier fixed with wood scraps and duct tape to hold frames upright.
I sprayed the transfer bees with my home-made honey-b-healthy and placed the frame into #3, replaced the second frame and closed it up.
I felt like I knew what I was doing! Until...
I wanted to give #3 another frame.  I had looked in #2 a few days after the first transfer.  I didn't think it was strong enough to donate any brood.  A few days ago, I went back into #1 and took a frame of brood as before.  As I  was placing it into #3, I saw two capped queen cells on it, near the bottom, like swarm cells.  I  hesitated- should I squish the cells, put the frame back into #1 or nothing.  I just went ahead and put the frame in.  Now I wonder what will happen when the queens hatch, or will the reigning queen kill them first.  I wrote to Kathy Niven to ask her opinion.  I figure I should leave the hive alone for a couple of weeks and then take a look.  The queen in #1 is small and dark.  If one of her daughters takes over in #3, perhaps she will also be either smaller or darker and I'll be able to tell the difference.  I hope it wasn't a big mistake to put that frame in.  All we can do is wait.

Wednesday, August 7, 2013

Treatment-free Beekeeping conference

At the end of last month I attended the titled conference in Oregon.  This link is information regarding it.  The talks seemed to be mostly for larger operations than mine, but I learned a lot by talking with other backyard beekeepers.  It seems that many of us have made the same mistakes along the way.  
One of my personal high points was meeting and talking with Tom Seeley.  I asked him about the technique for marking the thousands of bees in his artificial swarms.  Here is the picture if you don't remember.  He would cool a few bees in a baggie in the refrigerator, then place them on blue ice and glue on the tag, one-by-one.  What a job!
For one of the workshops, Prof. Seeley had made an artificial swarm.  I was able to see the scout bees doing their waggle-dance.  The next day, the scouts had decided on a site, had stopped dancing and were making a piping sound that lets the swarm know that it's time to get ready to go.  This is the only recording of the piping I could find.  The piping occurs at about 5:25, maybe other places, too.  The bees started making their buzz runs indicating they were about to take off.  I waited to watch, but my ride was waiting and I had to leave.  The swarm probably took off soon after I left.  This link is to a facebook page for the conference that has a picture of Tom Seeley, Kat Nesbit (conference organizer) and one of the speakers in front of the swarm taking off.


Monday, August 5, 2013

Are you still reading this?

I'd like to know from you, my audience, if I should continue posting this blog.  If you'd would enjoy further posts, should I make any changes?  Fewer links?  More videos?  Any suggestions?  Let me know soon.  Thanks
The apiary on July 31

Wednesday, July 17, 2013

Vacation over

After returning from our trip back east, I was anxious to get a look into the hives to see what the girls had done in the two weeks we were gone.  If my vacation is over, so is theirs.
The plums had ripened in our absence and many had fallen to the ground.  I was surprised to see the bees all over them.  I think they were sucking the juice rather than eating the pulp; they ignored the older plums.

I took a look into the hives on sequential days and put in sticky boards for a mite count.
Hive 1:  There was no honey in the top super, but the other super was very heavy, maybe 30 pounds.  The top deep box was also pretty heavy but I didn't inspect it.  I switched out the drone frame.  There were drones hatching as I watched.
Hive 2:  No honey in super.  There doesn't seem to be much new comb being drawn.  The hive looks healthy but nothing is changing- the population seems static.  Switched out the drone frame.
I looked at about 10 pupae and saw no mites other than one that was on top of a capped cell.
Hive 3:  There was no brood in the top box (there had been before).  There was capped honey around where the brood had been and some nectar.  There was still empty foundation on the peripheral frames in both boxes.  I spotted the queen.  There were 4-1/2 frames of capped brood, but this colony doesn't seem to be growing either.  I'm wondering about it making it through winter.  I'm thinking about how to deal with it; feeding, combining hives, sink or swim?
I took the sticky boards out after 4 days and the counts were high- 102,22,32- and I decided to treat all three with formic acid (mite away quick strips MAQ).  What a job that was.  One lesson I learned is that this kind of work would be a lot easier with 2 people.  I also learned that it's a good idea to follow instructions.  The packs have a picture of scissors pointing one way, and I didn't think it mattered which direction one went... until I went the other direction.  The formic acid pads have a paper wrapping around them that helps control the rate of evaporation (I think).  I discovered that this wrapper is open at one end and cutting the plastic pack open the wrong way also cuts and tears this wrapper.
I put one pad in #3 because of the small number of bees.  In the other hives I put the recommended 2. The pads are laid on top of the frames between the two deep boxes.  The bees make brace comb in this same space.  I tipped the top box up to expose the bottom and scraped off the wax.  Then I scraped off the wax on from the tops of the other frames.  Even doing that, the boxes in #1 didn't fit together properly and I had to open it again and scrape off more wax.  Then I just pressed down hard on the boxes to close the gap between them.  I still don't know what I'm doing.
The next day there were a lot of dead bees on #2 porch and inside under the lid.  This is the one that had the damaged paper wrapper.
Earlier the porch was carpeted with corpses

Under the telescoping lid
I hadn't had this problem with previous use of MAQs, but apparently this is not unheard of.  Today there was lots of activity around the hive, so it looks ok.
Here is a video of wash-boarding from a couple of weeks ago.


Thursday, June 20, 2013

Two more sources of nectar

When I was out in front, I heard a lot of buzzing.  Looking around, I found the source- the catalpa tree.
On the underside of a catalpa leaf

You may recall sometime ago when I wrote about extrafloral nectaries.  Well, catalpas are one of the plants with this source of nectar and are mentioned in this article.
Maidi had bought some marigolds for our yard party and she wanted me to plant them.  I put them in front of the cucumbers.  I wondered if bees visited marigolds.  I learned from on online search that marigolds repel many insects and nematodes and are therefore used as companion plants in vegetable beds.  Some marigolds will also repel bees.  Fortunately, ours do not:

She blends in well
Yesterday when I was tending to the roses, I heard a lot of buzzing.  There was a cloudlet of bees in front of hive 3.  Oh no, I thought, they're going to swarm.  When I had done the sticky-board counts last week, this hive had as much as the others, but since it had so many fewer bees, I figured the ratio of mites:bees was unhealthy.  I had only one Mite Away quick strip and two strips is the recommended treatment.  So I concluded that even though there was plenty of room in the hive, they were unhappy with the mites and were therefore swarming or absconding.
Fortunately, they all went back into the hive, so it must have been a large orientation flight.
First videoSecond video.
I had already ordered more quick-strips, but I put the remaining single one in, just in case. 
I still don't know what I'm doing.